Black and white photography is more than simply hitting “Black & White”
Check out the black and white photos that Los Angeles Standard Newpspaer Camera Club members submitted for this assignment at the link below.
Black and white photography is more than simply hitting the “Black & White” tab in photo editing software and calling it a day. You certainly can do that, and sometimes the default black and white settings will give you a great photo. But other times, you’ll end up with a photo that just has various shades of gray, which may not be too interesting.
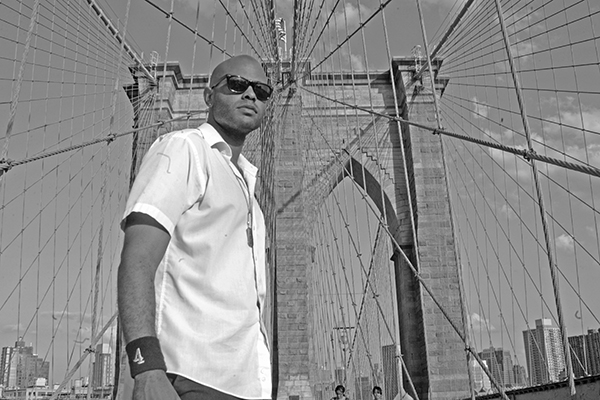
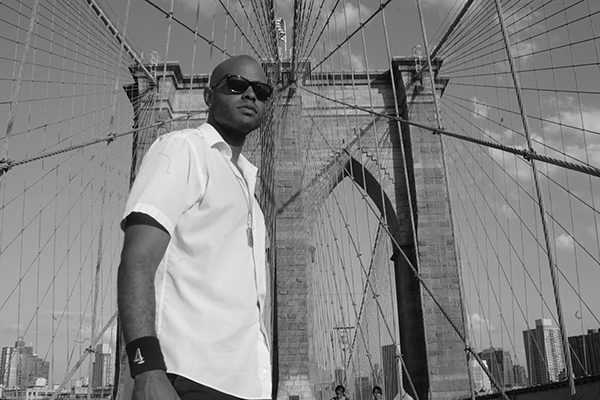
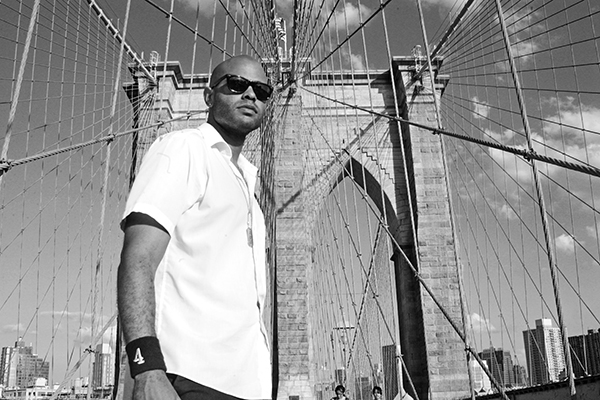
Photographer and Los Angeles Standard Newspaper Camera Club member Troy Tieuel made some very good points about what people should look for when editing black and white photos.
“When editing your black and white photos, look for the extreme black and the extreme white. A good image has BOTH. If your image lacks one, it will look dull and grey.
If you can’t pull both out, you didn’t expose right. If you let the computer do the exposure, you are likely to get that grey look.
Black and white is all about balancing the contrast between that black and that white.
Find the medium without over exposing (blowing out the whites or preventing that black-black) or underexposing (preventing the white-White and burning the dark areas.)
Find that perfect medium!”
So, to create contrast, it’s good when the blacks are truly black, and the whites are truly white, but like Troy said, don’t make the whites so white that they’re overexposed or the blacks so black that they’re underexposed. But you probably don’t want the blacks and the whites to be pulled toward the grays. Contrast also makes details and textures more pronounced in the photo.
The contrast between the lighter grays and darker grays are also important. In black and white photography, black and white tones obviously play a major role, but color is still a factor. Reds will have a certain tone when converted to black and white, as will blues, yellows, etc. It may not look very good if those tones look similar. When editing the photo, you can adjust the lightness and darkness of those tones, which can help create more contrast and make those tones more defined.
When editing photos (for these examples I’m either using Photoshop for JPEGs or Camera RAW for RAW files), you’ll have a number of controls and presets.
(***Note: I’m not a photo editing expert, so I’m figuring this out as I go. Please feel free to do your own research on photo editing techniques. The techniques below are mainly for beginners. There are a lot of Youtube videos with more advanced black and white editing techniques.)
In Photoshop, there are a few ways to convert a photo into black and white. Go to Images > Adjustments, and then either simply click on Black & White, or Desaturate. Either one will convert the photo to black and white. From what I can see, when selecting Black & White, you’ll be able to adjust the color tones. It gives you Reds, Yellows, Greens, Cyans, Blues, and Magentas (Desaturate does not give you these options). You can play around with those sliders to change the tones associated with those colors. There are also presets. You can play around with those to see if there is something you like. You can also use the presets as a starting point, and then adjust the sliders to get something that you like. Play around with the sliders and see how it affects the photo.
After playing around with the color sliders, you can then go to Images > Adjustment > Brightness/Contrast to adjust the blacks and the whites.
Another way to convert a photo to black and white in Photoshop is to go to Images > Calculations. Now, I do not have a full understanding of this, so you may want to further research it. From what I can see, it has two sources (I’m not sure what the difference is), and under each one you can adjust the channel. That has four options. Gray, Red, Green, and Blue. The different options dramatically changes the image. There are also presets under Blending. Again, I don’t really understand Calculations, so you’ll want to look that up.
If you’re working with a RAW image in Camera RAW, the various sliders are on the right side of the screen. The simplest way to convert the photo is near the top on the right hand side, where it says Treatment. Just click Black & White. Or you can move the Saturation slider all the way to the left. From there you can play around with the sliders. Typically, sliding the Blacks and the Shadows to the negative will make the blacks and darker tons darker, and moving the Highlights and the Whites to the positive will make the whites and lighter tons brighter. That will add more contrast. Also play around with the Contrast slider.
I’m still learning Lightroom, but it appears to be similar Camera RAW, and it also has presets for black and white.
There’s one cool trick that I picked up from photographer and camera club member Gail Oliver (https://www.instagram.com/fineartforinteriordesign/). It’s changing the sky to black.
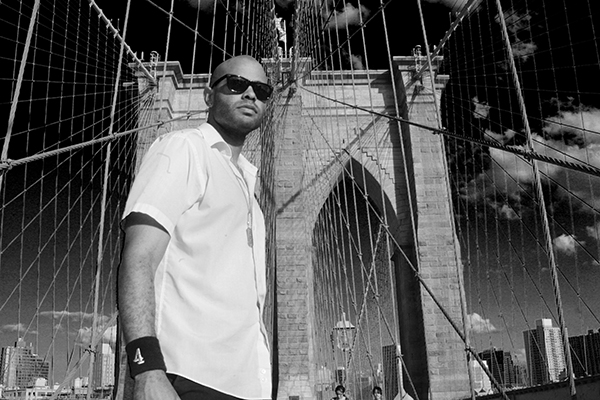
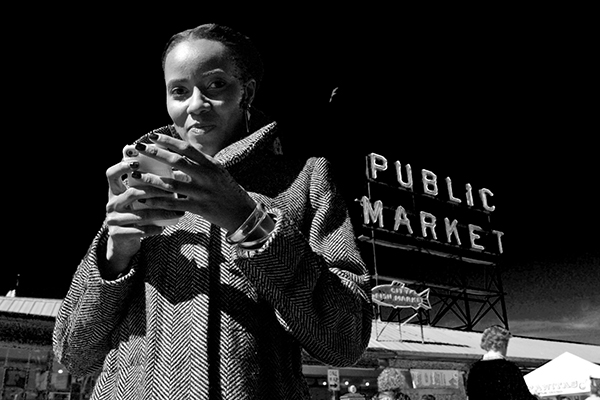
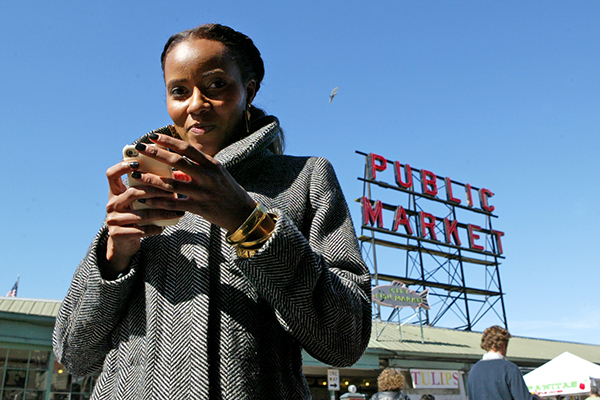
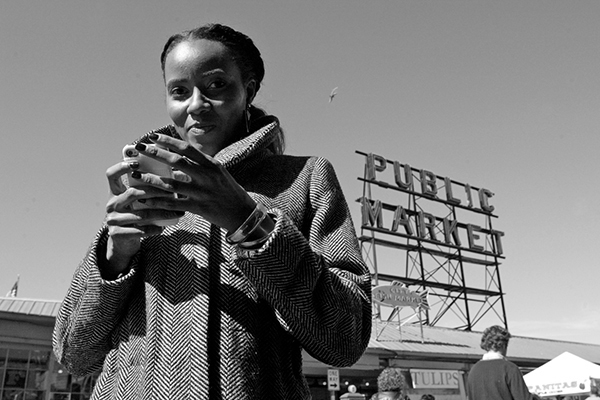
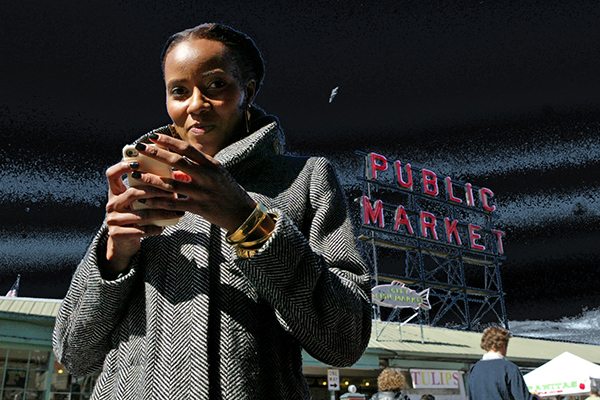
Typically in a black and white photo, a blue sky will be gray. Changing it to black is really cool looking because everything has natural sunlight, but the sky is black as night. The first time I saw Gail do this when she showed a picture of the Martin Luther King Jr. monument at Kennith Hahn Park. The monument is in the foreground, and the city, mountains, and sky are in the back ground. Everything is well lit and then there’s a huge black sky. She has also done this with a series of desert landscape photos that she’s been doing out at Joshua Tree.
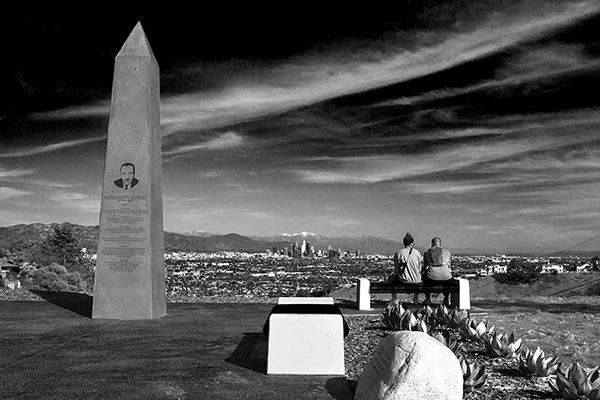
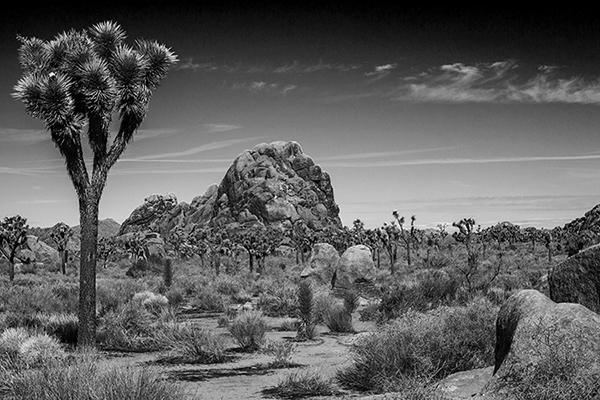
To create this in Photoshop, go to Image > Adjustment > Black and White, and then slide the Cyans and Blues, which are the colors associated with the blue sky, into the negative. In Camera Raw, convert the photo to black and white, and then go to the Black and White Mix tab. Slide the Blues into the negative.
In the Los Angeles Standard Newspaper Camera Club Facebook group, Greg Worsham (https://www.instagram.com/gworshphotography/) described how he converted this photo into black and white.
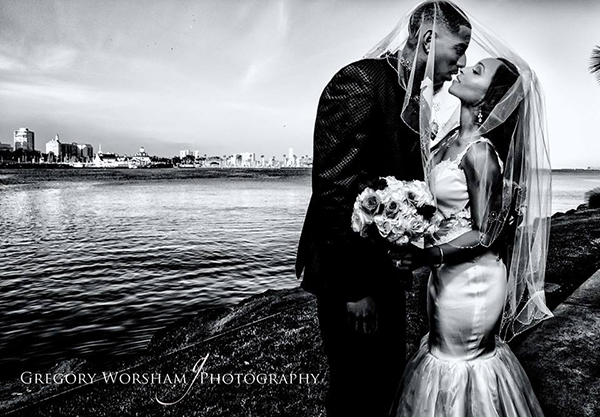
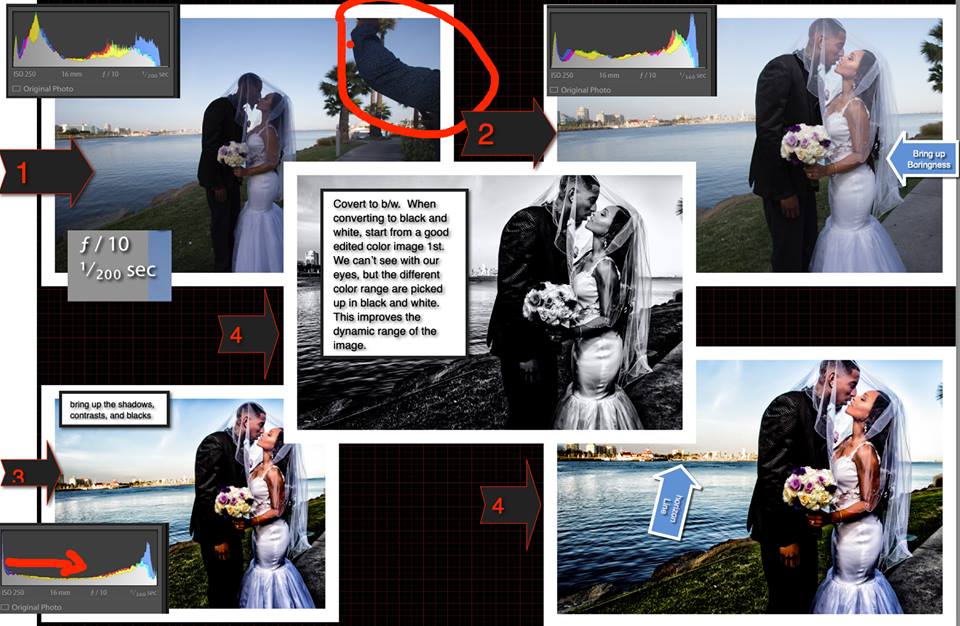
This is a long draw out answer to the setting for this image. Please keep this in mind when reviewing this image. I enlisted one of the wedding guests to hold a single light source (Canon 600EX) with an umbrella for me).
1. Fix the image while it is in color
2. After fixing the image figure out what enhancements can you do without just doing too much to the image.
3. Convert the image to black and white
That is about it. You have to pay attention to the histogram after taking the picture and during your editing process. Too much to the left, you have a gang of noise. Too much to the right you would blown out something important.
In this picture, the water and dress were my main considerations. So I shot it 2 stop underexposed. I shot in RAW. Editing was done in both Lightroom and PS.
The attached images detailed my shooting and editing path. It moves from top left to top right and bottom left to bottom right. The result is in the centerpiece.
Camera club meetings are held on the third Tuesday of each month at the L.A. Alpha House. 3712 W. 54th Street. Doors open at 6:30, meeting is 7-9 p.m. Free to attend. RSVP at This email address is being protected from spambots. You need JavaScript enabled to view it.
Stay updated on camera club meetings and tutorials on the Camera Club page of the Standard's website and join the Facebook group. If you are unable to make it to the meetings, you are still welcome to submit work.


