

This tutorial is on the very basics of shooting in manual mode.
By Jason Lewis
For the most part, this tutorial is about getting the right exposure using the manual setting, opposed to using the automatic settings. A photographer once told me that I need to be smarter than the camera, because the camera does not know what type of image that I’m trying to produce. Understanding how to shoot in manual mode improves your chances of obtaining the image that you want.
We'll start off with a couple videos before getting into an explanation with photos.
This video uses photographs to show the differences between ISO, shutter speed, and aperture.
This video has uses illustrations to show the differences between ISO, shutter speed, and aperture.
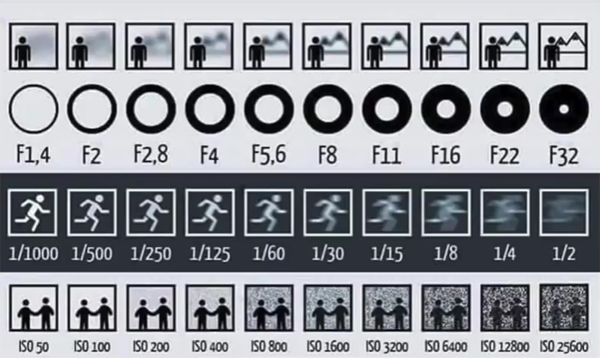
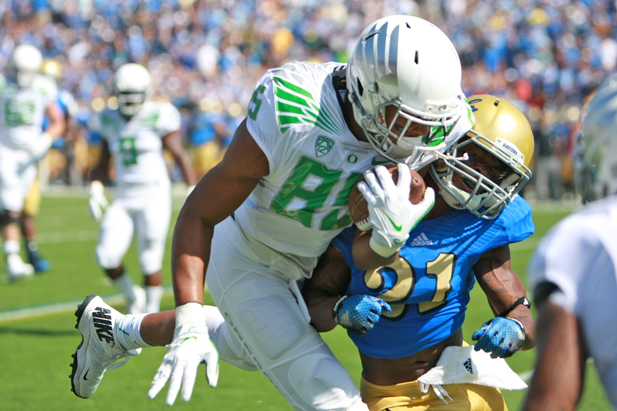
Once you understand aperture, shutter speed, and ISO, this photo makes perfect sense and tells you everything you need to know about the three. After understanding all three, come back to this photo for a better understanding.
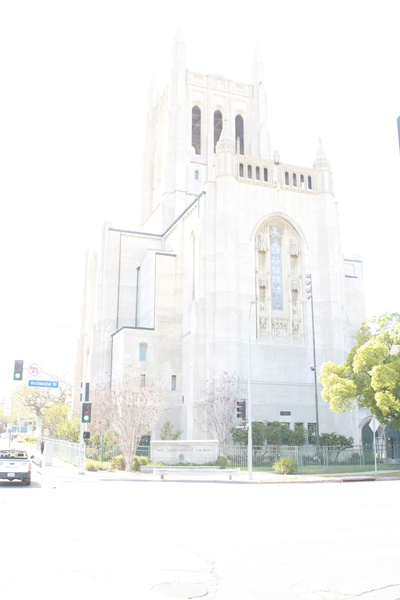
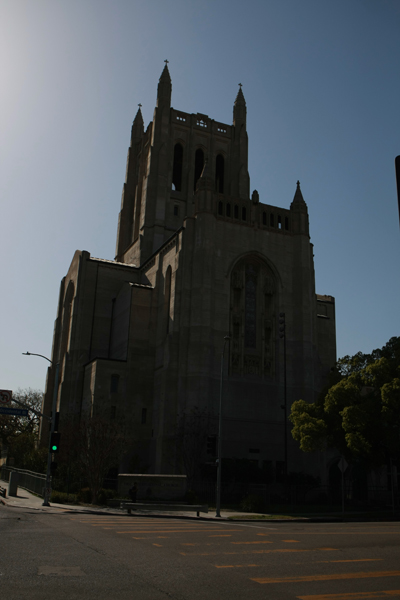
In a nutshell, getting the right exposure is getting the right amount of light on the camera’s sensor, or some years back, on the film. If too much light gets on the sensor, the image will be too bright, or overexposed. If not enough light gets on the sensor, the photo will be too dark, or underexposed.
The three basic elements that affects the amount of light that gets on the sensor are shutter speed, aperture, and ISO. The right combination of these three elements will produce a properly exposed image.
Shutter
The camera’s shutter covers the sensor. When a picture is taken, the shutter opens, exposing the sensor to light, and then it closes. The shutter’s speed can be set to different speeds, such as 1/125th of a second, or much faster at 1/4000th of a second, or much slower at 1 second. On my Canon Mark III 1D, the fastest shutter speed is 1/8000th of a second, and the longest is 30 seconds. Some cameras can do much longer than that. The faster the shutter speed, the less light gets to the sensor because the shutter speed is so fast. The slower the shutter speed, the more light gets to the sensor because the shutter is open for a longer period of time. If the image is too dark, using a slower shutter speed will allow more light in and can lead to the proper exposure. If the image is too bright, using a faster shutter speed will decrease the amount of light that reaches the sensor, which can lead to the proper exposure.


Aperture
The camera’s aperture, or f/stop number, is the opening in the lens, and it can be ajusted to be larger or small. A larger opening allows more light to hit the sensor than a smaller opening. The smaller the f/stop number, the larger the opening. So f/3.5 is a much larger opening than f/16. The aperture range typically depends on the camera lens. Kit lenses typically can go down to f3.5-f5.6. More expensive lenses go to f2.8. But some lenses (expensive and inexpensive) can go lower than that. If the image is too dark, increasing the aperture size (smaller number), will allow more light in, and brighten the photo. If the photo is too bright, decreasing the aperture size (larger number), will decrease the amount of light that gets to the sensor and it will darken the photo.


ISO
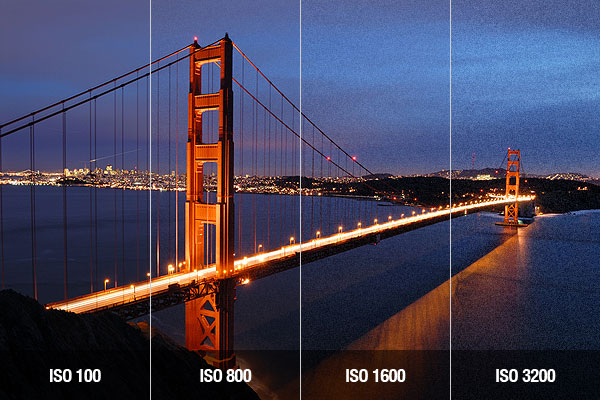
The ISO will lighten or darken an image. The higher the ISO number, the brighter the image will be. If the shutter speed is at 1/100, and the aperture is at f/5.6, but the photo is too dark, increasing the ISO will brighten the image. But the higher the ISO, the grainer the photo will be, which is also called noise. If the image is too grainy, it can look really bad, unless that’s what the photographer was going for. On a bright and sunny day, ISO 100 works well. If it’s a partially cloudy day, or you’re indoors with a lot of natural light, ISO 400 may be in order. If there are dark clouds, ISO 800 may work. If Indoors, where there isn’t much or any natural light, higher ISOs will probably be in order. Older digital cameras would produce very grainy photos at ISO 1000. But newer cameras can go much higher without the image being grainy at all. That makes it much easier to shoot in poor light conditions. My first digital camera, the Mark I, could only do ISO 1250 and look good. ISO 1600 or higher looked very grainy. My Mark II could do about ISO 2000. I’ve shot ISO 3200 with my Mark III and the images still looked good. Newer cameras can do much better than that.


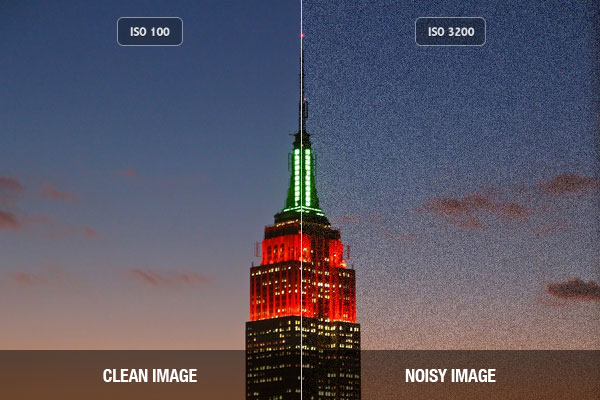
As the ISO increases, the image becomes grainer. But newer cameras do much better at higher ISOs than older cameras.
Shooting in Manual
When shooting in manual, the first thing that should be determined is the ISO. And the photographer should know how high their ISO can go before the photo starts to get grainy. Whatever ISO that is, the photographer should stay under that. If there is great light, use a low ISO number. If the light isn’t good, raise the ISO number.
Once the ISO is set, it’s now time to chose the proper combination of shutter speed and aperture to obtain the right exposure. A further explanation of shutter speed and aperture is below, but for now, lets just use some basic numbers. If the camera is set at 1/200th of a second and f/5.6, and the image is too dark, lowering the shutter speed to 1/100th of a second while keeping the f/stop at 5.6 would brighten the image. Also lower the f/stop to 3.5 while keeping the shutter speed at 1/200th of a second would brighten the picture. Or, lowering the shutter speed to 1/100th of a second and also lowering the f/stop to 3.5 will brighten the image. All of those adjustments lets more light in, brightening the image. If the image was too bright, increasing the shutter speed, or the f/stop number, or both, will darken the image by letting less light in.
Choosing between shutter speed and aperture can depend on the affect that the photographer is going for.
Aperture-Depth of field
Aperture controls depth of field. An image shot with a large aperture, such as f/2.8, will have the focus point in focus, but the foreground and background out of focus, or blurred. The technique draw’s the attention to the subject, which is in focus. This is used a lot for portraits, where the photographer does not want the background to be distracting. This is also used in sports photography to draw the attention to the athlete. A higher aperture, such as f/8 or higher, will produce an image where the foreground and background are also in focus. This is good when elements surrounding the subject will help tell the story of the image, so it’s important to have those elements in focus. A higher f/stop is also good for group shots when people are standing at various distances from the camera. In a large group shot where people are in rows, the first row may be 10 feet away. The second row may be 12 feet away. When the aperture is large, if the focus point is on the people in the first row, they will be in focus while the people in the back row may be out of focus, even though they are only a couple feet away.

Shutter speed- freezing the action
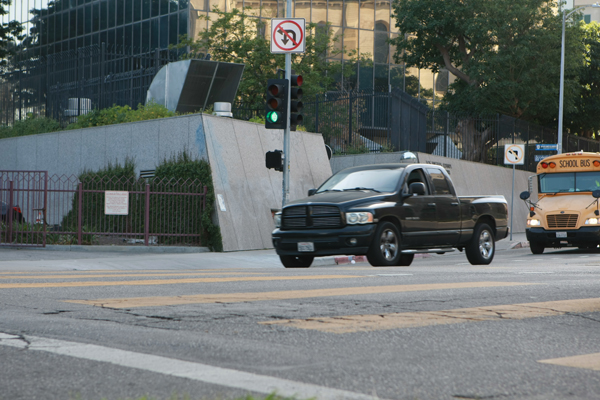
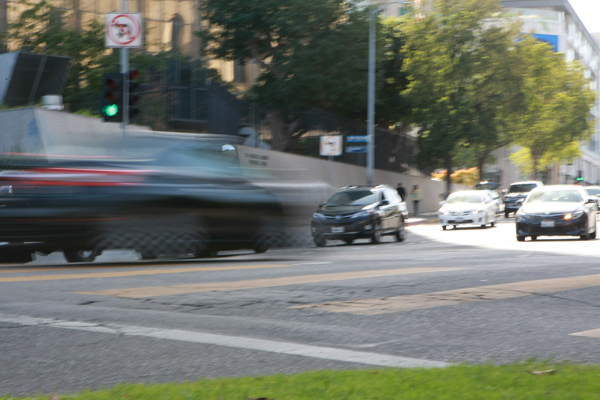
Shutter speed stops the action, or blurs it. At 1/2000th of a second, everything in the image will be frozen, even if people or objects are moving fast. But at 1/60th of a second, fast moving objects will be blurred. That shutter speed is not fast enough to freeze the action. Shooting sports, 1/400th of a second will freeze the action for the most part, but there can still be some blur. Shooting at 1/1000th of a second and above is ideal. While shooting people just doing typical movements, which are much slower than people moving at high rates of speed, shooting above 1/100th of a second will freeze most movement. Shooting below about 1/50th of a second can start to be a problem. While people are talking, if they are moving their hands around, their hands can become blurred. Also factor in that the photographer standing and holding the camera is not as still as a tripod. The body and arms tend to move, so at slower shutter speeds, that can become a problem.
Shutter speed- long exposure
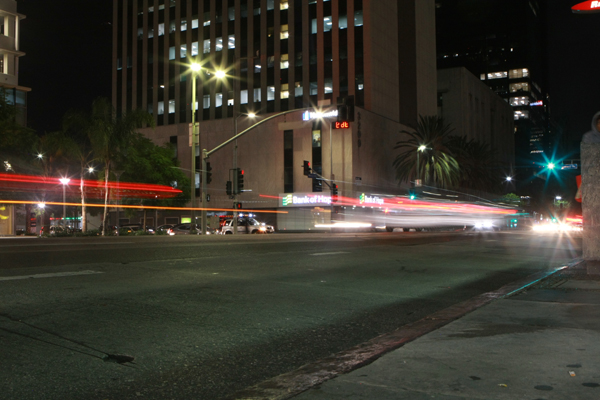
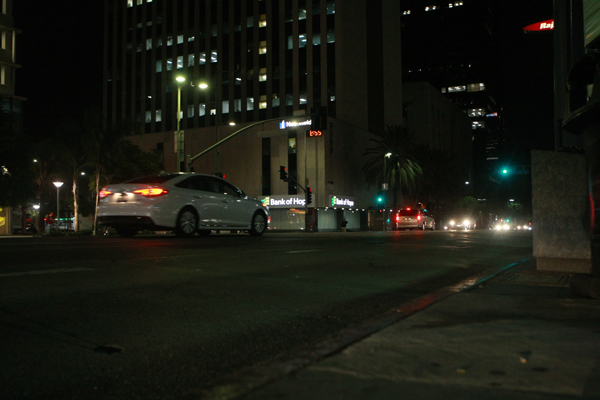
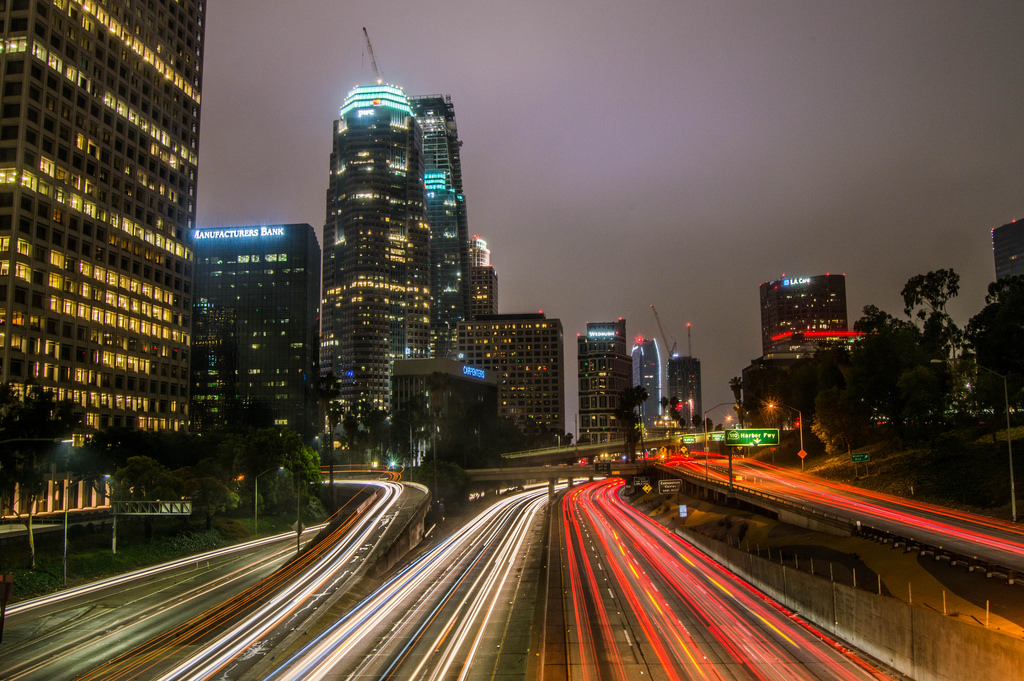
Long exposures can create some very interesting images. The typical images that you’ll see are the streaking head and tail lights from cars driving down the street. The shot works by putting the camera on a tripod, and then setting the camera’s shutter speed to a second to several seconds. It has to be long enough for cars to travel through the image. Because the camera is on a tripod, the street and buildings will be sharp. But anything moving in the photo will look like a streak. Long exposures can also be used to make water falls or waves at the beach look like they are flowing. Long exposures are also used at night time to take photos of buildings, structures, or the sky.
————
When shooting on manual, select your ISO first, and then determine what you are looking for in your photograph. If freezing the action is the most important element, then select your shutter speed first, and adjust the aperture as needed to to obtain the proper exposure. If depth of field is important, set the aperture to obtain the desired depth of field, and then adjust the shutter speed to obtain the desired exposure. When changing the settings, stay within the range that you and your camera can handle. If the photo looks too grainy above ISO 2000, then don’t go over that ISO. Either adjust the shutter speed or the aperture. If the photo becomes too blurred under 1/60th of a second shutter speed, then don’t go under that. Adjust the aperture and ISO for the right exposure. If you’re looking to have multiple elements of the image in focus, don’t shoot at a low aperture setting. Adjust the shutter speed or the ISO.
Once you understand how to manipulate shutter speed, aperture, and ISO, it becomes pretty simple to find the right combination for your photos.
——————
Just a few points on two other settings besides manual. Most DSLR’s have aperture priority and shutter priority. With those settings, you select one of the settings, and the camera will select the other setting for you. For example, if you’re using aperture priority, and you select f/5.6, the camera will select a shutter speed to get the right exposure. If you select f/16, it will give you the shutter speed for that. If you use shutter priority and you set the shutter speed at 1/500 of a second, the camera will select the proper aperture. In my experience, I typically use aperture priority when I’m in extremely good light, such as shooting outdoors on a sunny day. I select the ISO and aperture and then I don’t have to worry about making adjustments, because the camera will give me the right shutter speed for a good exposure. But shooting indoors, especially if there isn’t much if any natural sun light, I shoot on manual. At night, I always shoot on manual.